Showing posts with label Web Tweaks. Show all posts

Migrate Your Feedburner Subscribers To Mailchimp

Feedburner has always been the first priority email marketing service for every blogger user. But, Unfortunately, Feedburner does not have all those features which other competitors like Mailchimp and Aweber have . Many people do not migrate from Feedburner thinking that other services are costly and people also fear that they may lose their subscribers. But, now its time to erase this myth. Feedburner does not allow us to send emails at anytime like other services like Mailchimp. Recently, we migrated from Feedburner to Mailchimp's free service. Mailchimp's free service has a limit of sending 12000 emails in your lifetime and your subscriber count has a limit of 2000. Anyways, i did not import my old subscribers which were nearly 149 because most of them were not at all responding. And, right now i have got 21 confirmed subscribers in Mailchimp . So, now i think you know why you should transfer to a modern interface. So, now i am going to show you a tutorial on transferring your feedburner email subscribers to Mailchimp .

How To Transfer Feedburner Subscribers To Mailchimp

Before we go on to transfer your fedburner subscribers to Mailchimp, first you have to import your feedburner subscribers into a file. This process will make us easier to transfer the subscribers in toMailchimp. Here are the steps. 

  1. Go To Feedburner and access your account and click on the feed that you want to import .
  2. Clcik on Publicize and now click on Subcription Management in the left side menu .
  3. Scroll down and click on ' View Subscriber Details '
  4. Now, you can see all your subscribers .
  5. There will an option named Export CSV . Click on it a CSV file will be downloaded. Check the image for more . Now, you have successfully imported your email subscribers.


Okay ! Now that you have imported your feedburner subscribers , Now lets go to Mailchimp and export them there . Follow the steps written below and everything will be easy for you .

  1. Go To Mailchimp and Sign Up for a free account . After that log in into your dashboard .
  2. Click on Lists from the menu on left side . And then click on Create A List .
  3. Now, type the required information and click on Save .
  4. Now, you can access your email lists . In lists menu, no your new list will be found .
  5. Click on it to access it . 
  6. Now click on Add Subscribers in the top menu and a dropdown menu will appear .
  7. There, click on Import subscribers .
  8. A new page with many exporting methods will appear. 
  9. There click on Upload from CSV File .
  10. Browse for the CSV file and upload it .
Now you have successfully transferred or migrated your subscribers from Feedburner to Mailchimp, you can now start new campaigns and design it and send it straight to your subscribers anytime from anywhere . But, rmember on thing, you have only 12000 mails left . Happy Blogging !

How To Clone Any Blogger Template, Widget And CSS Codes

advanced tutorial on Blogger template cloningActually , this thing which i am going to share is an illegal thing which i really oppose to . I am writing this to make sure that your hard work on your template will not go waste. Blogger Template is made up of HTML5 and CSS3 . We all know it . We all have spend a lot of time in adding widgets, creating widget, customizing template, adding CSS and many other for making our template beautiful. But, BEWARE ! Any blogger template, widget or CSS styles are clonable if you have a browser which supports HTML5 . I strictly oppse this way of cheating other . But, it is a must that we should make our blogger template protected .Template cloners are increasing day by day . So, we should all make our template protected ! Moreover , if our template keeps on getting cloned, you will waste a lot of time in redesigning it instead of posting at your blog . First, I will share with you ' How To Clone Any Blogger Template,Widget Or CSS Coding ! Again , this is one of the disadvantages of Blogger . Blogger blogs are getting more vulnerable . Not to hacks, but to clones ! Websites like BlogTipsNTricks are now frequently updating their blog design to cloning !

Some Requirements 

- It Should be Hosted On Blogger or Wordpress ( Worpress is a bit difficult )
- HTML5 supported Browser like Google Chrome
- Some HTML Knowledge
- Adequate CSS Knowledge

Steps To Clone Blog Hosted On Blogger 

+ Open the blog which you want to clone .
+ Now , Click on the settings tab on the top right under close button in Google Chrome.
+ Now click on Tools.
+ Another menu will appear 
+ Now Select the option 'View Source'
+ A new tab will appear.
+ This is the template of the blogger blog.
+ Check The image for better understanding .
+ You also have to make necessary changes to make it work in Blogger 


Steps To View Source Code In Google Chrome

Facts

+ Its not as easy as you think 
+ This is easy to copy the codes of widgets
+ But, the whole code will not work properly, unless you apply necessary changes

How To Protect Your Blog

Now as you know that your blog is very highly vulnerable to clones if you are having a good design.The blogger template is all based on CSS and HTML . The CSS decides the way how an HTML object works. So, if you can hide the CSS, then you can surely block any cloner. CSS ca be hosted in Google Drive. This is more faster than hosting in your template and never think of any downtime because Google is faster than your computer !

First of All , You should hide your CSS . You can host it in Google Drive or any other . A Detailed tutorial on Hosting CSS on Google Drive is available at Blogger Yard - Host CSS In Google Drive

Now , You should try to make the cloner more confused . +Syed Faizan Ali of MyBloggerLab suggested to make your CSS coding in a jumbled manner so the cloner gets confused . Indeed , It is a good way, because HTML and CSS is coded in such a way that if it is not in proper order, thn you may really get mad and you might even lose your control! .So, Lets take our blog to the next level by protecting our Blog design from Cloners. Thank You ! Happy Blogging !

Google Sphere Tweak - Mr.Doob Tricks

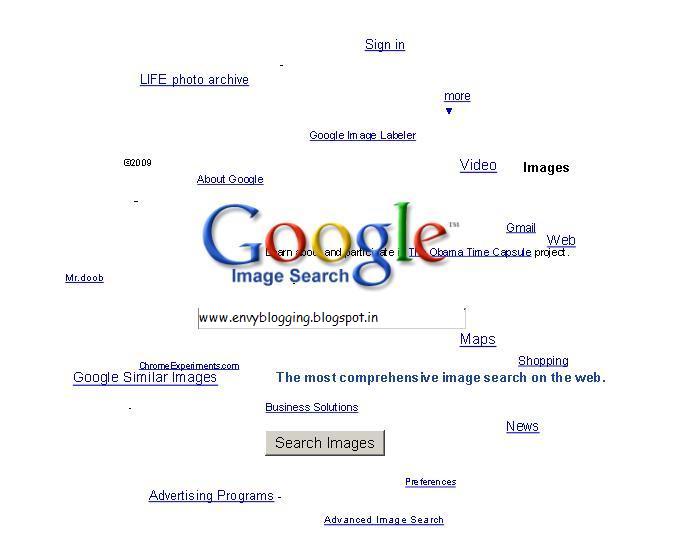
Google Sphere
Google Is One Of The Best Search Engine , Or Maybe It Is The Most Popular Search Engine In The Whole Universe . So , As A Popular Search Engine , They do Have Many Projects To Make The Readers Enjoy The Visit . One Such Example Is the Barell Roll Which Makes The Whole Search Engine Do A Barell Roll . So Here , This Is Another Project With The Help Of Mr.Doob And Also If You Do This Tweak , It will Be Redirected To MrDoob.com Where You Can Search images .So , This Is A Very Good Project Which Makes The Readers Think That It Is An Unknown Tweak , But Its Not . The Steps Are Quite Easy But You Have to Do Some Steps Before Doing This .

STEPS
  • First , Go To http://www.google.com/preferences And Tick The Never Show Instant Results
  • Then Go To Google Search Engine And Search For ' Google Sphere '
  • And Click On ' I'm Feeling Lucky '
  • Now , You Will Be Redirected To Mr.Doob's Project Website And You Can search images With A A Sphere Design
So , This is another Google tweak which is specially made for the people's relief . Thanks for your time and see you at the next tutorial !